With production rates of 3,200 pieces per hour for a single production line and an acceptance rate of virtually 100% required by mobile phone and hard drive manufacturers (one defective piece per 120,000), 100% inspection of the components is necessary to ensure that all orders will be accepted by the end customer.
Contributed by | Microscan
Company Profile
Jiaxing Hexin Precision Stamping Technology Co., Ltd., based south of Shanghai in China’s Zhejiang province, specializes in the manufacture of precision stamped components, including parts for consumer electronics, pneumatic tools, cutting tools, and automotive and general industrial parts. Continually focused on elevating its product quality to meet the most stringent customer quality requirements, Hexin is poised to become a premier supplier of precision stampings in Asia and throughout the world.
The Challenge
Dimensional measurement is an essential step in the manufacture of Hexin’s stamped parts in order to ensure that each workpiece meets required tolerances. Traditionally, this has been done with a contact measurement device such as a micrometer or other manual measuring tool. However, as customer requirements for part accuracy and production capacity increase, these manual inspection methods become problematic, resulting in low efficiency and high labor intensity. To address the demands of the growing consumer electronics industry, where a large number of stampings are used as mechanical parts in computer hard drives, mobile phones, and other devices, a more efficient automated inspection method is needed to meet the industry’s high quality standards for both mechanical dimensions and surface appearance, while also satisfying the large production capacity of these parts.

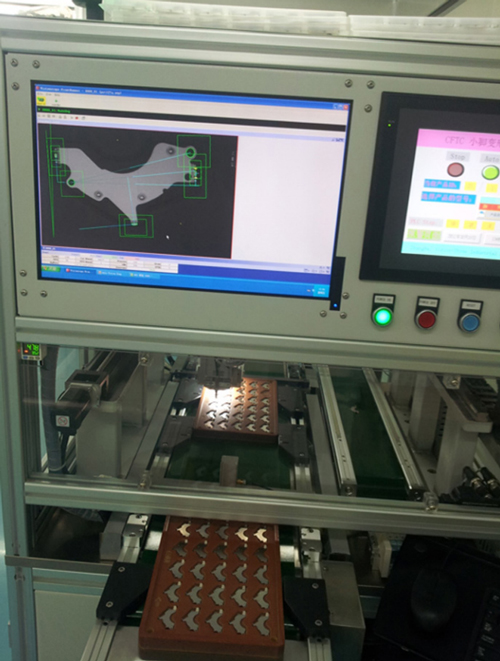
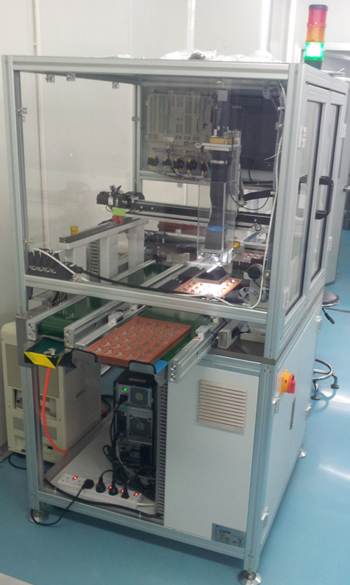
The line scan pin deformation measurement system, installed by Jiaxing Hexin Precision Stamping Technology Co., Ltd., takes imensional measurements using Microscan Visionscape’s powerful toolset
With production rates of 3,200 pieces per hour for a single production line and an acceptance rate of virtually 100% required by mobile phone and hard drive manufacturers (one defective piece per 120,000), 100% inspection of the components is necessary to ensure that all orders will be accepted by the end customer. A user return caused by a defective product is not only costly; it may also leave a negative impression of the manufacturer’s quality practices.
Through the course of undergoing several processes during production - especially after mechanical milling - some deformation of the pins on the stampings is inevitable. Stamping manufacturers use dimensional measurements to identify and reject defective units in order to prevent shipping them out. Done manually, all pieces are placed in a standard measuring tool one by one and determined to be acceptable or not. With daily production runs of 300,000 pieces typical for the industry, a large number of employees working around the clock are needed to meet required quantities.
The Solution
Compared to manual inspection, a machine vision system offers improved accuracy, high consistency, and works nonstop without fatigue. Well aware of these benefits, Hexin looked to Microscan partner Shanghai Vision Stone Industrial Automation Co., Ltd., to deliver an automated solution to strictly control product quality and prevent unnecessary return loss. Vision Stone provides customized machine vision and automation systems to address a broad range of user requirements.

Conclusion
After installing Vision Stone’s automated line-scan pin deformation measurement system, Hexin is able to easily meet the strict requirements of its customers for product quality and production quantities, with the peace of mind that none of its shipments will be returned because of defective parts. An integral part of the solution, Microscan’s Visionscape software has the functionality and flexibility to satisfy the specialized requirements of the precision stamping industry. Looking forward, Vision Stone plans to collaborate with more companies in East China and offer its pin deformation inspection system as a standard solution in the Asia-Pacific region and other countries around the world.

Microscan’s Visionscape® is a comprehensive machine vision software that can be used on machine vision boards, GigE solutions, and smart cameras.
About Microscan
Microscan actively supports both technologies and strives to address customer applications appropriately and without bias. We continue to develop innovative solutions using both lasers and imaging for barcode applications as we expand our growing portfolio of machine vision systems, machine vision lighting, software, and hardware solutions.
The content & opinions in this article are the author’s and do not necessarily represent the views of RoboticsTomorrow
Comments (0)
This post does not have any comments. Be the first to leave a comment below.
Featured Product


