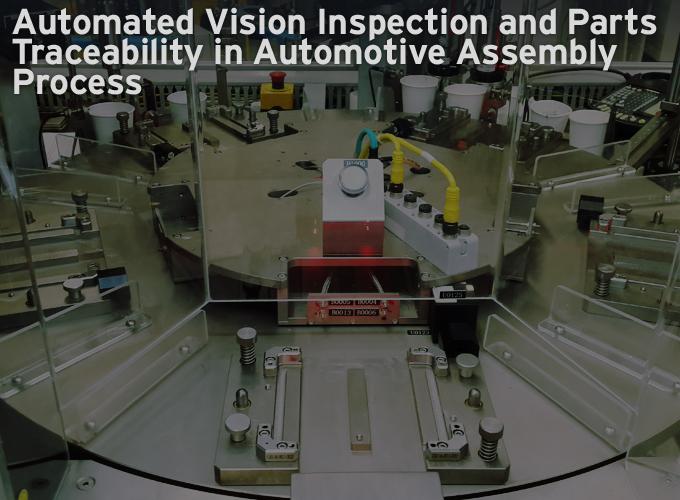
Compared to manual inspection, a machine vision and barcode reading system offers improved accuracy, higher consistency, and it works non-stop, day in and day out.
Contributed by | Microscan
Company Profile
TRW Automotive is the global leader in automotive safety. Among the world’s largest automotive suppliers and one of the top fi nancial performers in the industry, TRW had 2012 sales of $16.4 billion. TRW supplies more than 40 major vehicle manufactures and 250 nameplates, holding leading positions in all of its primary product categories. TRW is dedicated to delivering the safety that everyone deserves.
With the broadest portfolio of active and passive safety technologies of any supplier, TRW produces advanced active systems in braking; steering and suspension; and sophisticated occupant safety systems, including airbags, seat belts, and steering wheels. TRW has over 65,000 employees working in more than 185 locations in every vehicle-producing region worldwide.
Customer: TRW Shanghai
Industry: Automotive manufacturing
Application: Vision inspection and barcode reading in manufacturing assembly
Products: Microscan Vision HAWK smart camera, QX Hawk imager, NERLITE HI-BRITE lighting
Distributor/integrator: Vision Stone
The Challenge
TRW is committed to providing the highest quality products possible. To ensure quality, TRW decided to implement several automated machine vision quality checks at their assembly line in Shanghai.
The inspection solution had to be able to check automatically the correct positioning of the components on the assembly line, as well as measure the angle and length of the components, and detect the quality of the coating.
In addition, the correct position had to be determined before applying coating on the PCBs. It is diffi cult to ensure consistent coating quality with manual checks, as such checks are subject to the accuracy of each operator. TRW also needed a new type of assembly line. Some of the components were assembled manually, and the conveyor used was prone to vibration, especially at higher speeds. This was challenging for the assembly workers, and could cause human errors, such as incorrect assembly or missing components.
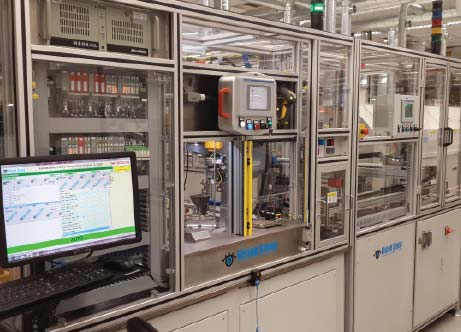
Vision Stone developed and installed a custom-made vision inspection system for TRW with multiple smart cameras from Microscan.
In addition to the conveyor system and automated vision inspection solution, TRW requested that the vision inspection results should be easily communicated to the central PLC at the facility in real time.
Requirement: Automotive brake parts assembly requires precision and stability, but the conveyor assembly line vibrates at high speeds, causing the products to shake, leading to human errors such as incorrect assembly or missing parts. � ï®
Project: Vision inspection of the PCB position in automotive assembly line, detection of sealant and glue quantity, quality and position, using barcodes to trace parts with seamless connection of vision inspection results to facility automation system.
Solution: A new assembly line with a rotary table design using Microscan’s Vision HAWK smart camera and Visionscape machine vision software for vision inspection, and QX Hawk imager to decode barcodes for parts and products traceability. Microscan industrial lighting is used to assist vision detection.
Result: Vision inspection system is a reliable, quick and effective way to reduce human errors and increase efficiency in automated assembly.
The Solution
Vision Stone, a Shanghai-based industrial automation expert and Microscan partner, provided a customized machine vision and automation solution to address the broad range of customer requirements.
In line with TRW’s needs for automated vision inspection, barcode traceability and easy connectivity, Vision Stone developed a system featuring several Microscan Vision HAWK smart cameras, as well as QX Hawk industrial imagers.
Microscan’s advanced machine vision software platform Visionscape® provides a full set of vision tools, and it is easy to connect to a PLC or other industrial control systems. Various image processing tools such as image rotation and warping, grayscale morphology, as well as calibrated dimensional measurement tools were deployed in the automated inspection and assembly process.
Vision Stone’s software engineers used Microscan Link to connect the Vision HAWK to the PLC or PC. This allows easy output of the inspection data to an Allen Bradley PLC. They also used the Mask Tool to shield the parts that do not need to be inspected, which helps to eliminate rejection due to false negatives.
Integrated with PLC and PC software, the Visionscape platform enables Vision Stone’s application engineers to realize high-performance vision inspection without additional cables, as the smart cameras only need one power cable and one Ethernet cable. Vision Stone also utilized barcode imagers from Microscan for parts traceability on the vision inspection system.
Systems Implementation
Vision Stone installed the new assembly line at TRW, consisting of two rotary tables. One of the tables is used for components assembly, while the second table combines the cover plate with the correct housing once all the components are assembled. The new design makes effi cient use of robotic arms to save space, while being easy to maintain. The operators simply need to place the parts onto the assembly line and pick up the complete products after assembly.
In the assembly process, fi ve feeders transport fi ve different components to be processed. The QX Hawk industrial imager reads the code on the housing, and three robotic arms are used to place the components into the housing. The machine vision system then checks the quality and makes sure that the product is assembled correctly.
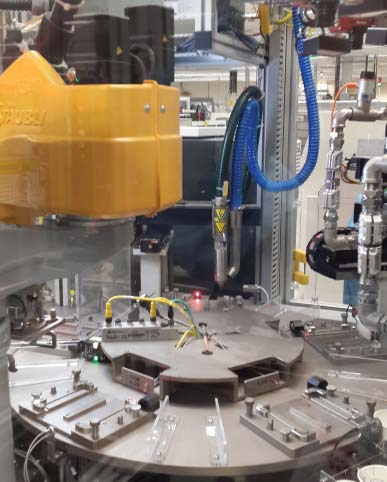
Microscan’s Vision HAWK is integrated into a robot arm for vision inspection on the assembly line.
It checks that there are no air bubbles in the glue used for sealing to ensure coating integrity, before the products go into the oven.
In addition to making sure that the individual components are inserted into their correct positions, the vision system checks the solder position, the sealant and cooling gel position, and gel coverage rate on the cover. The cooling gel coverage is vital as too little of it will cause the parts to become too hot, and too much gel will affect the appearance. The components are also inspected to test for polarity, positioning or damage. The solder inspection is very important because if the stitch is even slightly bent, the product will be scrapped. Machine vision inspection of the sealant and cooling gel position will enable automated rejection of incorrect parts, without having to stop the assembly line.
Six Vision HAWK smart cameras and two QX Hawk imagers are integrated in the system together with Microscan’s NERLITE® HI-BRITE industrial lighting. Lighting is critical in machine vision applications, as it allows the vision cameras to “see” the part or mark.
The work order of the system is as follows: fi rst the empty housing is checked for any debris or defects, then a barcode is read on the housing. The next step is polarity detection after all components are inserted into their correct positions.
Finally, size and angle measurements are carried out, the solder position is checked, and the sealant and cooling gel are tested at the coating station. The barcode is read again for traceability and to ensure that the housing and cover match.
The Benefits
Compared to manual inspection, a machine vision and barcode reading system offers improved accuracy, higher consistency, and it works non-stop, day in and day out.
Vision Stone engineer Mr. Yingjie Zhu comments: “There are several reasons to choose Microscan products. Firstly, Microscan has a broad product portfolio, from barcode readers to machine vision products. For this system, we chose a barcode imager for traceability, and a smart camera to inspect the parts. In addition, Microscan offers industrial lighting for a complete solution. Microscan’s vision products are very easy to use, and we do not need to do extra work to communicate the results to a PLC or other industrial controls. In the future, Vision Stone will perfect the system and add even more vision inspection functionality.”
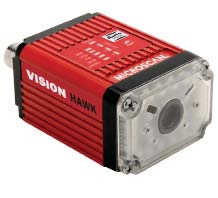
Vision HAWK Smart Camera
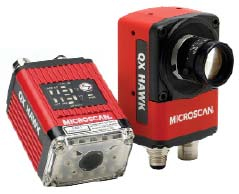
QX Hawk Industrial Imager
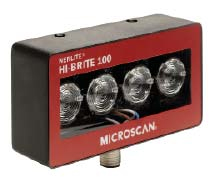
NERLITE HI-BRITE lighting
About Microscan

Founded in 1982, Microscan has a strong history of technology innovation which includes the invention of the first laser diode barcode scanner and the 2D symbology, Data Matrix. Today, Microscan remains a technology leader in automatic identification and machine vision with extensive solutions for ID tracking, traceability and inspection.
Microscan focuses on technologies of automatic identification (auto ID), machine vision, and illumination with application solutions ranging from basic barcode reading up to complex machine vision inspection, gauging, and measurement. Our solutions help manufacturers around the world drive down cost and waste, automate critical manufacturing processes, and increase yields.
The content & opinions in this article are the author’s and do not necessarily represent the views of RoboticsTomorrow
Featured Product
